Let's Encrypt 的免费证书只有90天有效期,你是否经常忘了续签?本文将手把手教你使用Certbot 并设置自动续签,一劳永逸解决证书过期问题。
不同于其他大多数文章,本文使用 Cloudflare 完成域名所有权验证,好处是 Certbot 与 Web 服务器不需要安装在同一个服务器,但要求域名必须托管在 Cloudflare 上。
TIP
你也可以使用 acme.sh,可以参考这篇文章
安装 Certbot
Certbot 在不同 Linux 发行版上的安装方式或许有所不同,这里介绍 Debian 和 Fedora 上的安装方法,如果使用其他发行版,可以参考官方的文档。
Debian:
sudo apt install python3-certbot python3-certbot-dns-cloudflareFedora:
sudo dnf install certbot python3-certbot-dns-cloudflare其中 python3-certbot-dns-cloudflare 用于完成域名所有权验证。
创建 Cloudflare API 令牌
登录你的帐户,检查一下是否有权访问域名,然后右上角点击 配置文件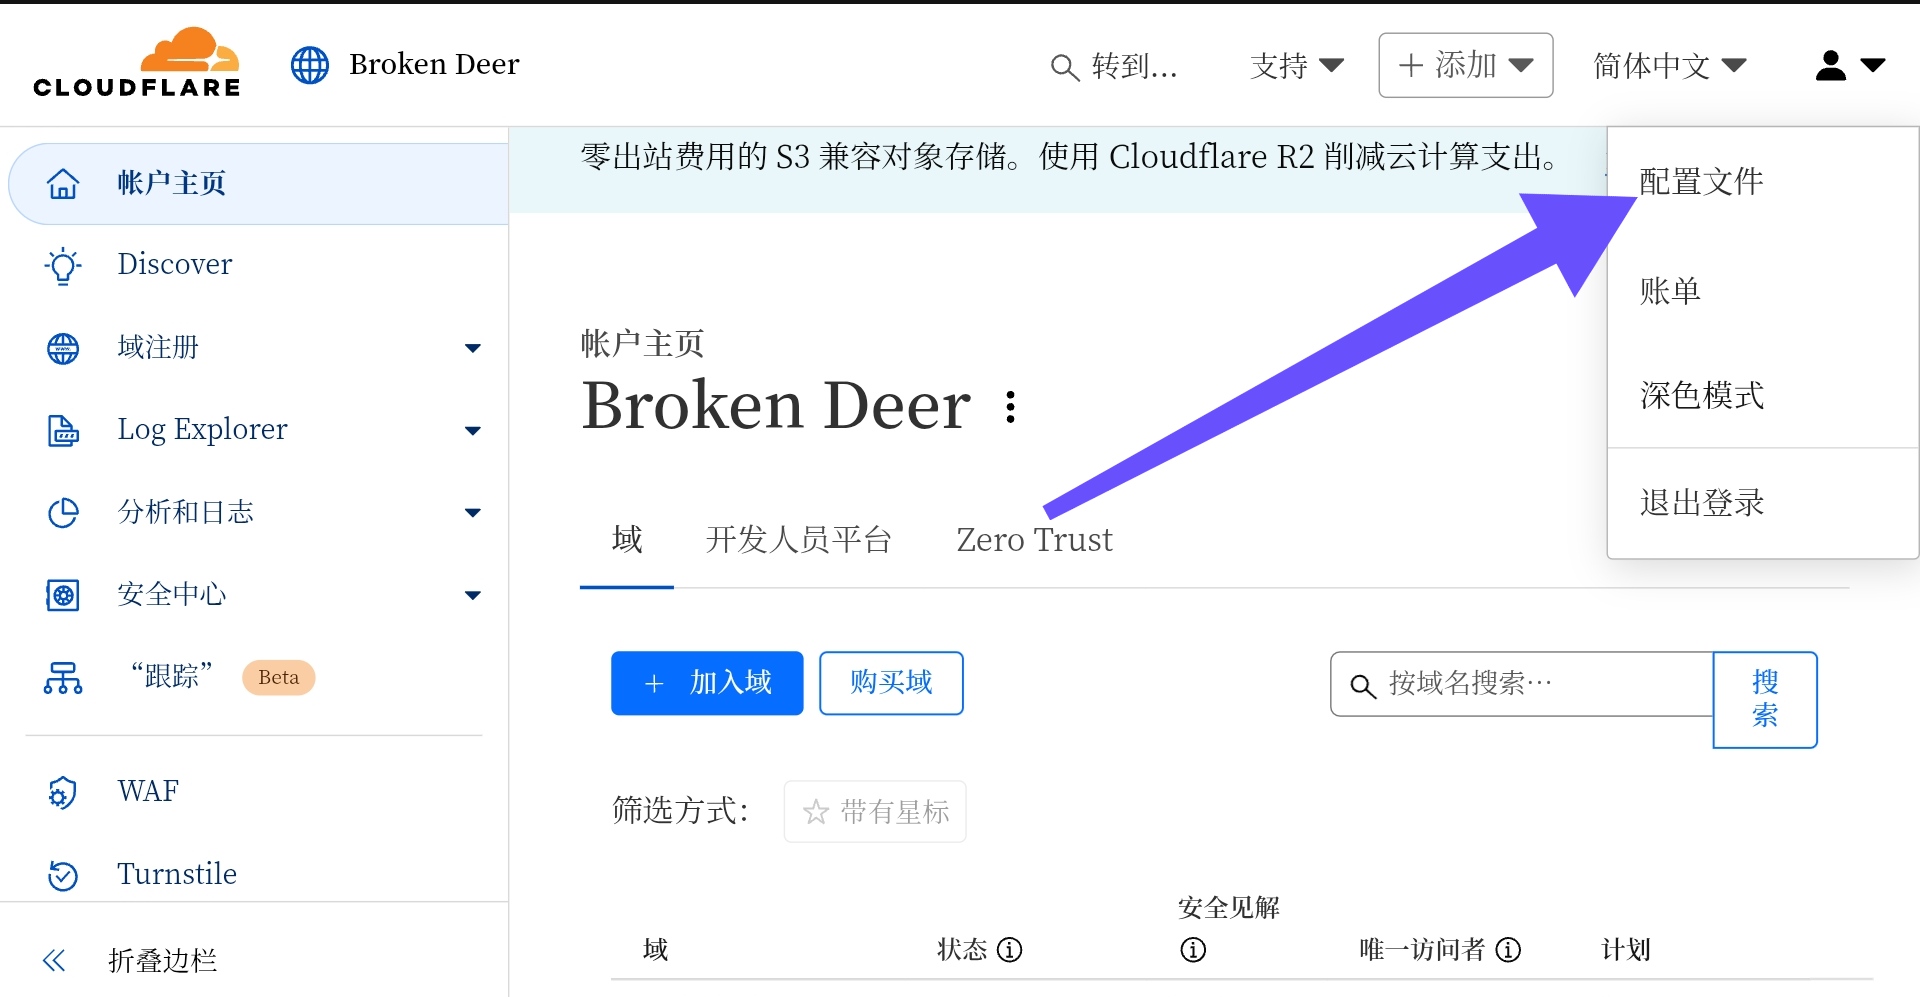
选择左侧的 API 令牌,选择 创建令牌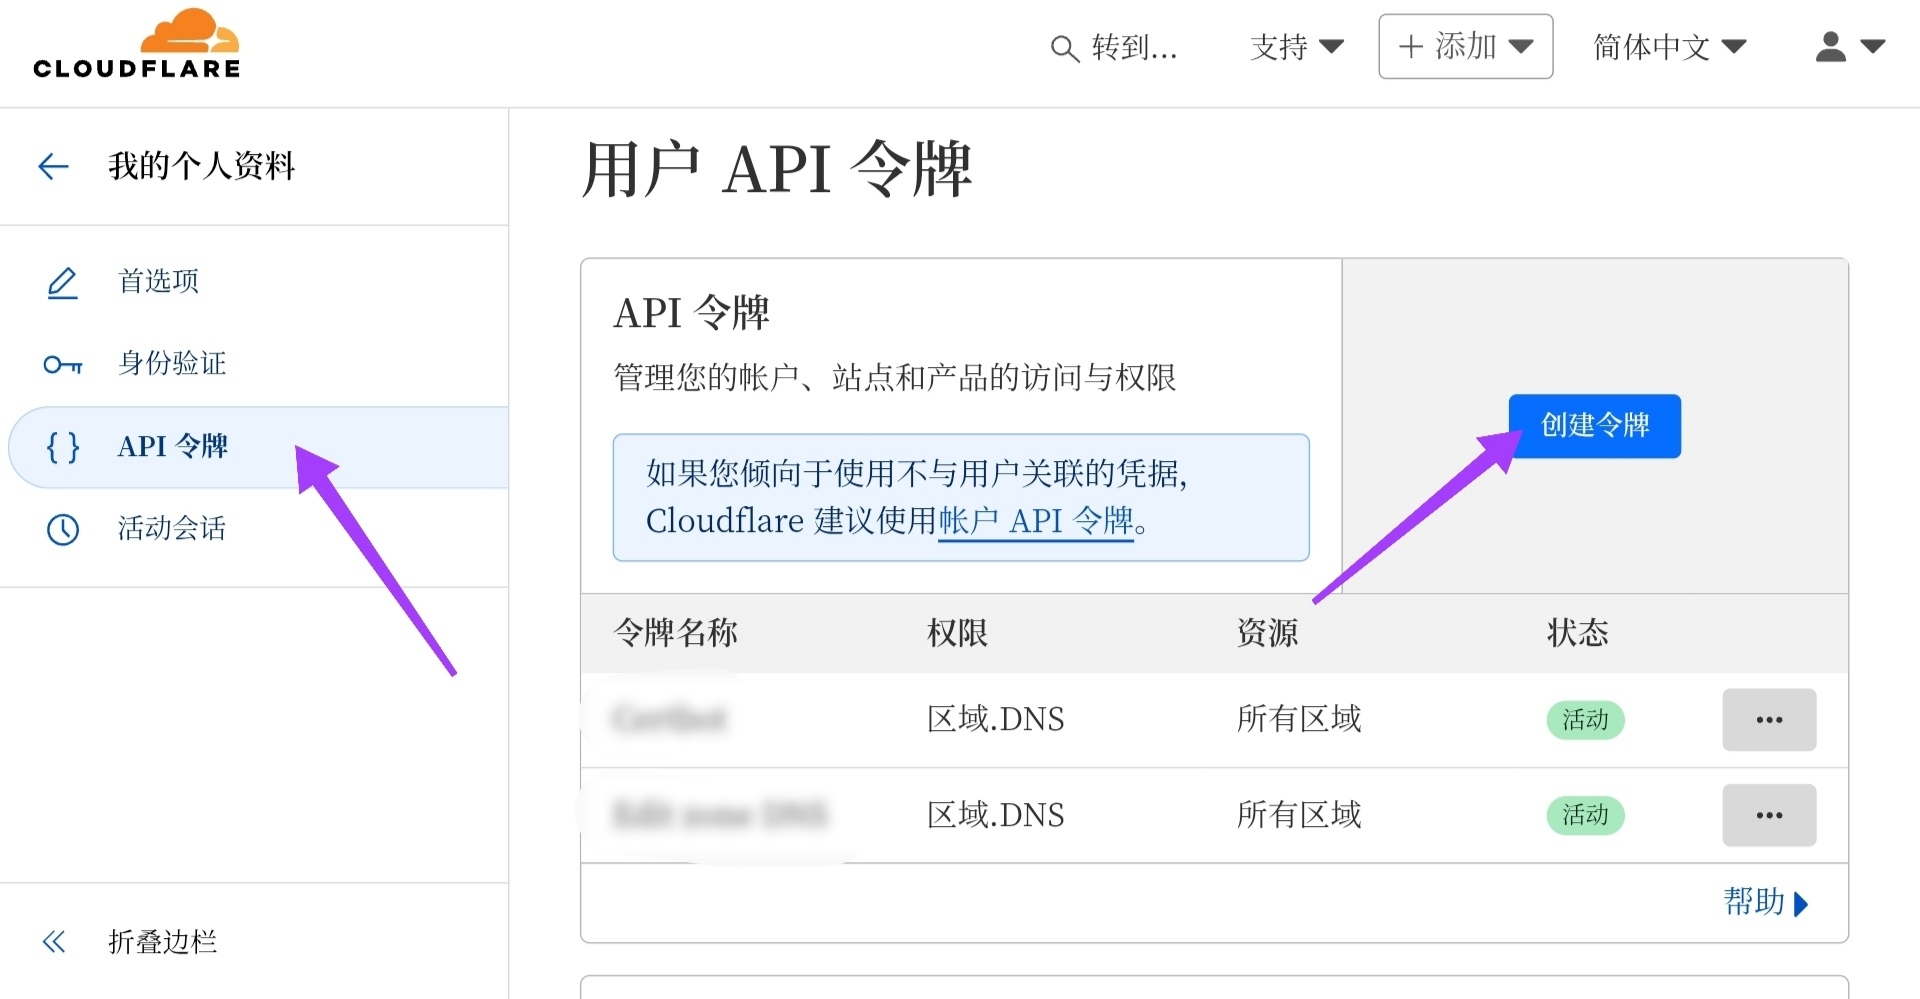
选择 使用模板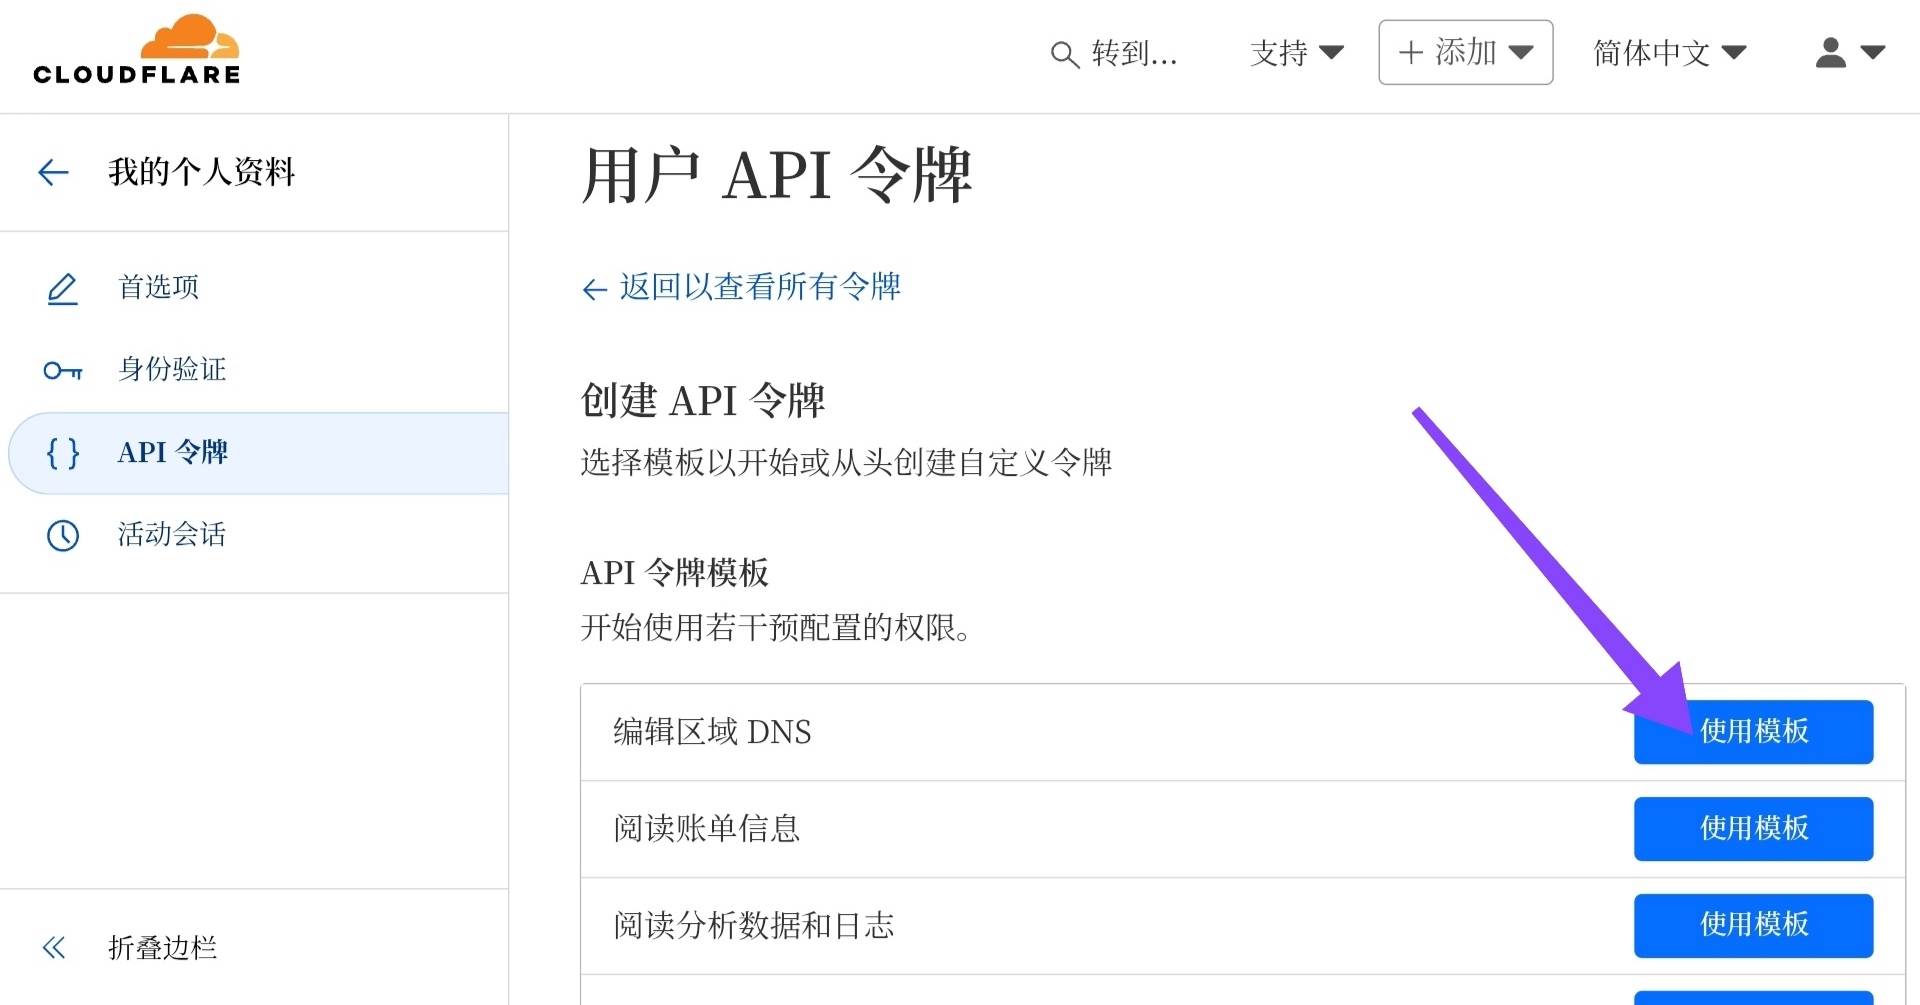
区域资源 下面选择 所有区域,然后点击 继续以显示摘要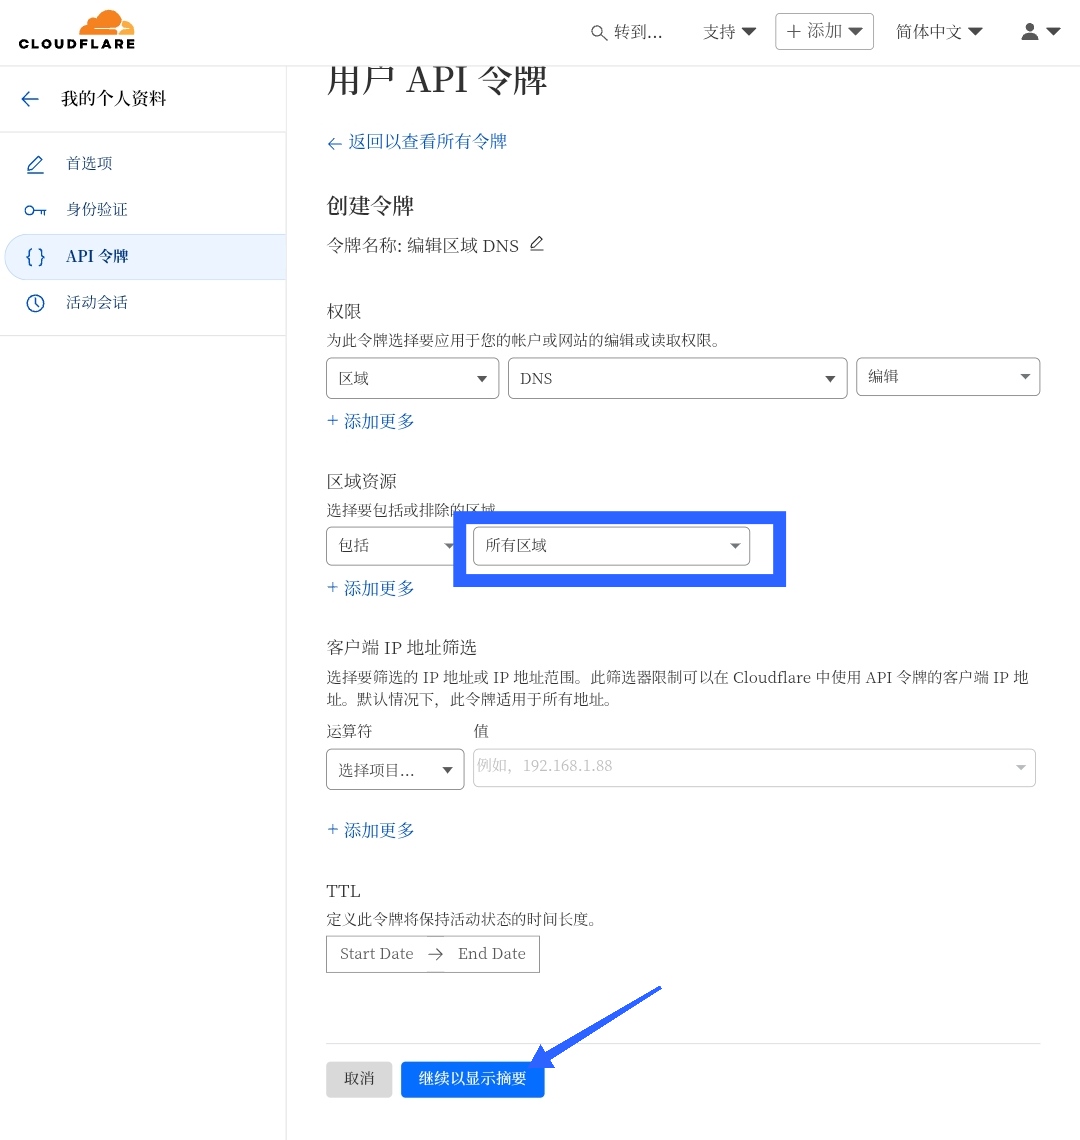
然后点击 创建令牌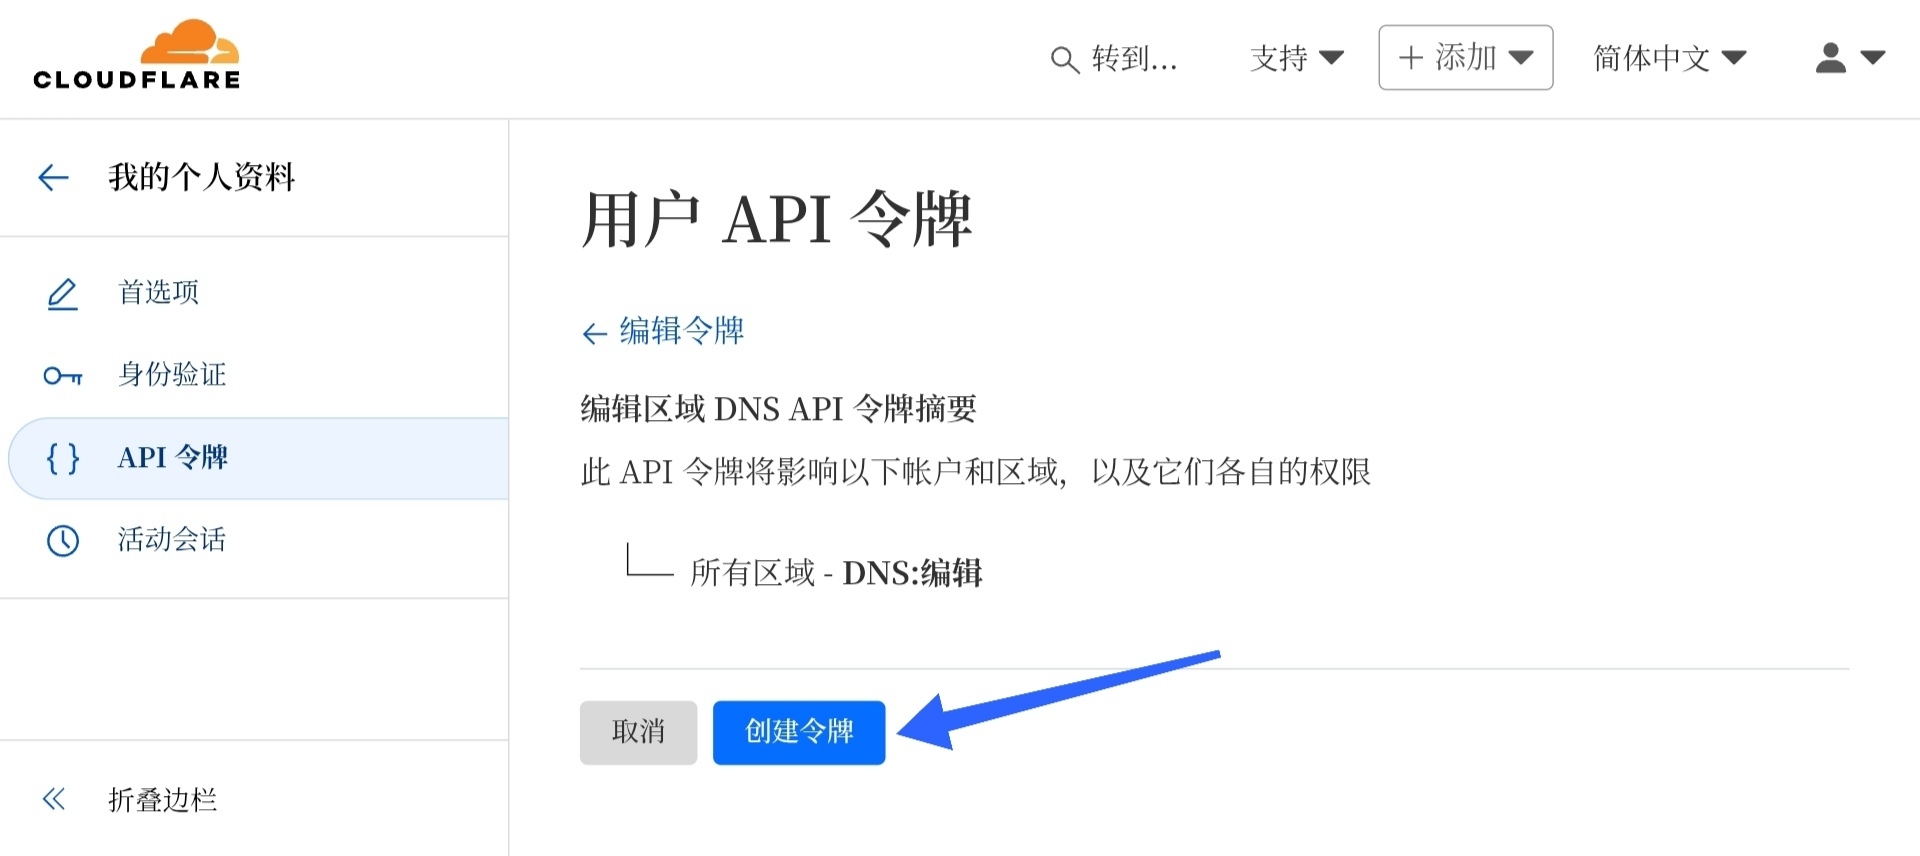
最后点击 Copy,复制你的 API 令牌,下一步要用 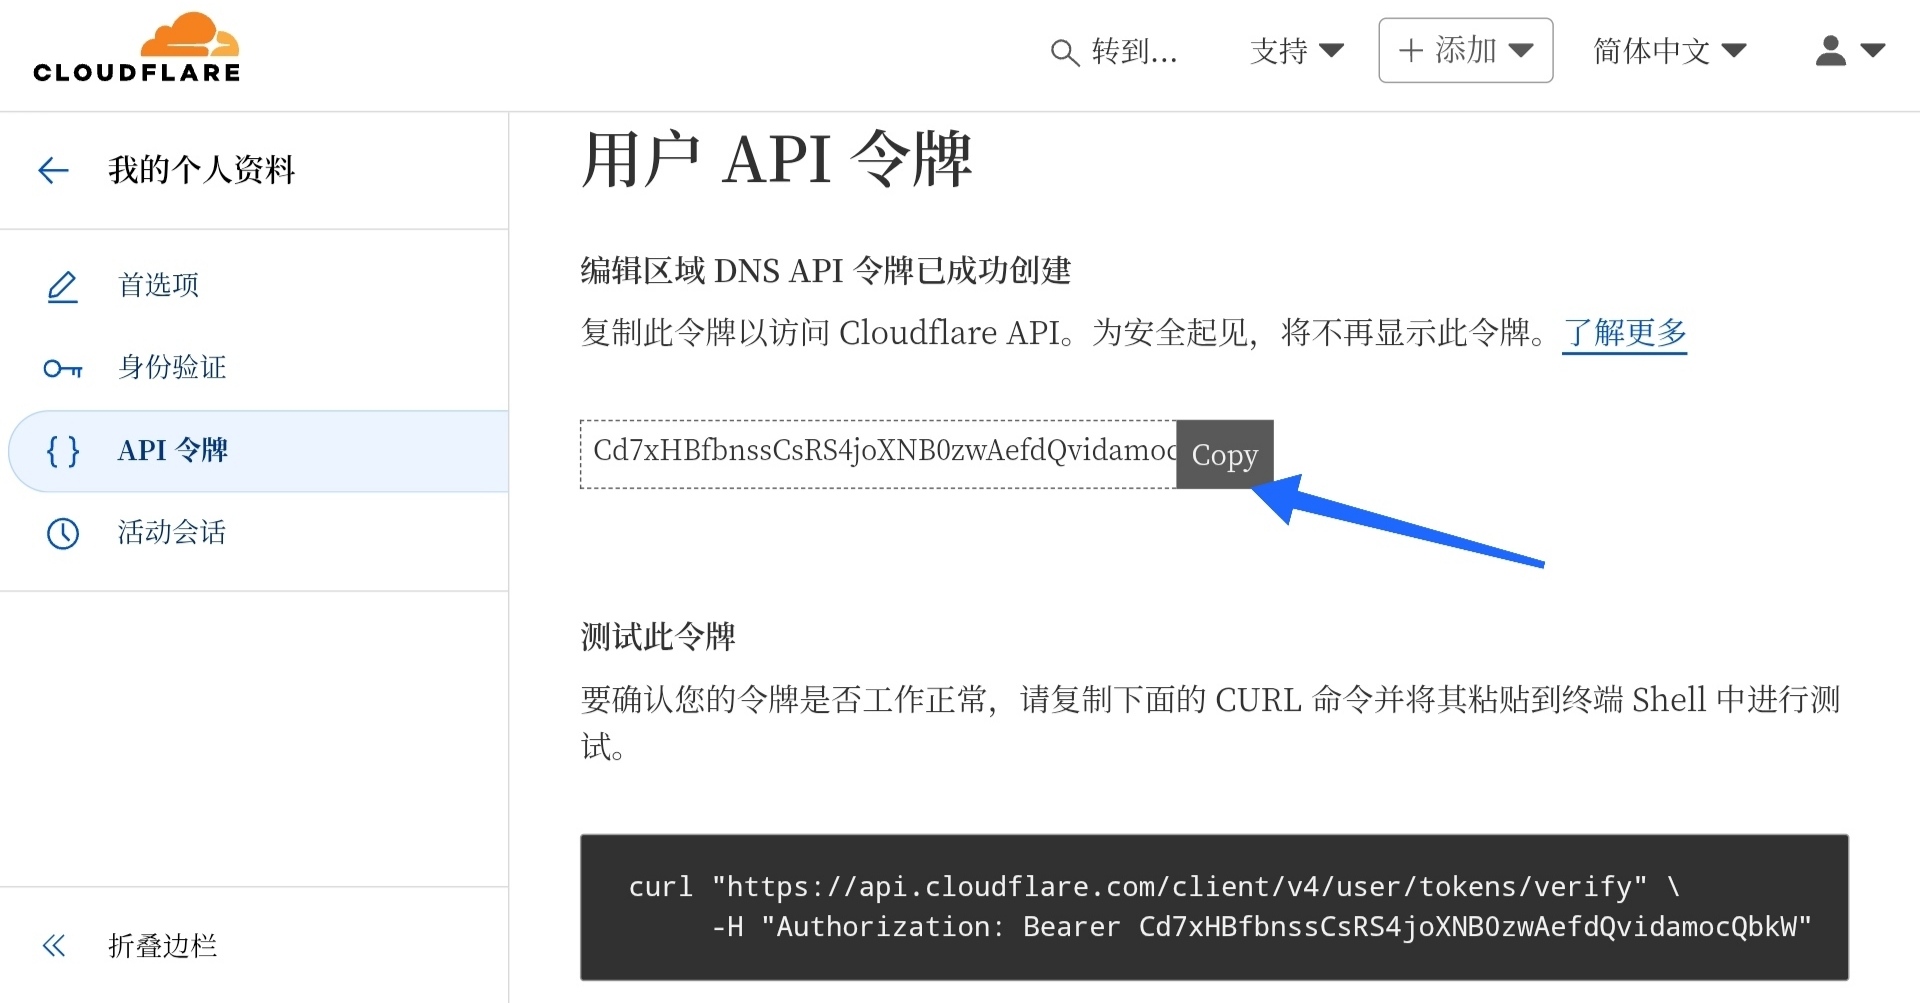
警告
此处的 API 令牌仅在创建时可以查看,如果没保存就关闭就需要重新创建 API 令牌。
创建 Cloudflare 配置文件
首先创建一个配置文件,用来保存 Cloudflare API 相关参数。将以下内容写入 /etc/letsencrypt/cloudflare.conf 中,dns_cloudflare_api_token后面改成上一步复制的 API 令牌。
dns_cloudflare_api_token = xxxxxxxxxxx获取证书
示例命令(-d 后面自己换成你的域名)::
sudo certbot certonly \
--dns-cloudflare \
--dns-cloudflare-credentials /etc/letsencrypt/cloudflare.conf \
--dns-cloudflare-propagation-seconds 60 \
--preferred-challenges dns \
-d "xxxx.com" \
-d "*.xxxx.xom" \
参数解释:
certonly:只申请而不安装证书,之后可以手动安装到 Nginx 服务器--dns-cloudflare: 指定 DNS 服务提供商为 Cloudflare--dns-cloudflare-credentials:指定 Cloudflare 凭据路径--dns-cloudflare-propagation-seconds:更改 DNS 记录后,等待记录生效的秒数--preferred-challenges:指定验证域名所有权的方式为 DNS-d:你想要申请证书的域名,可以有多个-d,支持通配符域名
运行此命令后,将会显示以下内容:
Saving debug log to
/var/log/letsencrypt/letsencrypt.log
Enter email address or hit Enter to skip.
 (Enter 'c' to cancel):
可以输入你的邮箱,也可以直接按 Enter 跳过。
然后出现以下内容:
- - - - - - - - - - - - - - - - - - - - - - - - - - - - - - - - - - - - - - - -
Please read the Terms of Service at:
https://letsencrypt.org/documents/LE-SA-v1.5-February-24-2025.pdf
You must agree in order to register with the ACME server. Do you agree?
- - - - - - - - - - - - - - - - - - - - - - - - - - - - - - - - - - - - - - - -
(Y)es/(N)o:
输入 y,然后回车
然后会自动验证域名所有权并申请证书,出现下列内容则代表申请成功:
Certificate is saved at: /etc/letsencrypt/live/<你的域名>/fullchain.pem
Key is saved at:         /etc/letsencrypt/live/<你的域名>/privkey.pem
This certificate expires on 2025-10-30.
These files will be updated when the certificate renews.
Certbot has set up a scheduled task to automatically renew this certificate in the background.

- - - - - - - - - - - - - - - - - - - - - - - - - - - - - - - - - - - - - - - -
If you like Certbot, please consider supporting our work by:
 * Donating to ISRG / Let's Encrypt:   https://letsencrypt.org/donate
 * Donating to EFF:                    https://eff.org/donate-le
- - - - - - - - - - - - - - - - - - - - - - - - - - - - - - - - - - - - - - - -
中间可能会有一行红字 Unsafe permissions on credentials configuration file: /etc/letsencrypt/cloudflare.conf,说明 Cloudflare 配置文件的权限不对,非 root 用户也可以读取配置。为了安全考虑,你可以把它的权限设置成 600。
为 Nginx 安装证书
在 Nginx http 块中添加这些内容:
ssl on;                                                       ssl_protocols TLSv1 TLSv1.1 TLSv1.2 TLSv1.3;
        ssl_prefer_server_ciphers on;
        ssl_certificate /etc/letsencrypt/live/这里换成你的域名/fullchain.pem;                                                        ssl_certificate_key /etc/letsencrypt/live/这里换成你的域名/privkey.pem;
然后重启 Nginx。
证书续签
使用以下命令测试配置是否正确:
sudo certbot renew --dry-run如果出现以下输出,则配置没有问题:
Congratulations, all simulated renewals succeeded:
  /etc/letsencrypt/live/<你的域名>/fullchain.pem (success)
然后执行 sudo crontab -e,并在打开的文件末尾加上这样一行并保存:
0 5 * * 1 certbot renew之后会在每周一凌晨五点检查过期时间,如果剩余小于30天则会更新证书。
证书更新后,需要重启 Nginx。如果你的 Nginx 也运行在这里,你可以改用下面这行:
0 5 * * 1 certbot renew —deploy-hook “systemctl restart nginx”这样续签完成后会自动重启 Nginx,你也可以编写脚本实现更复杂的功能,比如重启其他服务器上的服务。